Где искать: по сайтам Запорожской области, статьи, видео ролики
пример: покупка автомобиля в Запорожье
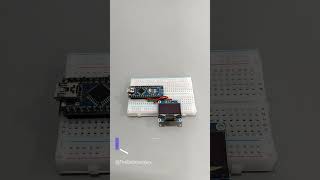
DIY Tachometer using IR sensor and Arduino!
 У вашего броузера проблема в совместимости с HTML5
Steps to make this tachometer:
1. Put the Arduino Nano on the breadboard
2. Connect the SDA and SCL pins of OLED to A4 and A5 respectively.
3. Connect the OUT pin of the IR sensor to digital pin 2 of Arduino nano and give +5v and GND connections.
4. Upload the code. (The code is pinned in the first comment.)
Explanation:
The current time in milliseconds is stored in the ‘currentMillis’ variable.
If the time difference between the current time and the previous time stored in previousMillis is equal to or greater than 1000 milliseconds (1 second):
The interrupt is temporarily detached to avoid conflicting with the counter variable.
The RPM value is calculated by dividing the counter value by 2 (assuming each revolution triggers two interrupts) and multiplying it by 60 to convert it to RPM.
The counter is reset to 0.
The interrupt is reattached to the IR sensor pin.
The previousMillis is updated to the current time.
The OLED display is cleared.
The RPM value is displayed on the OLED display.