
Thursday, 04 June, 2026г.


Где искать: по сайтам Запорожской области, статьи, видео ролики
пример: покупка автомобиля в Запорожье
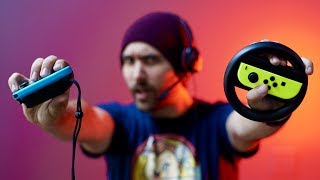
Nintendo Switch Pro Controller Buttons Replacement Guide
 У вашего броузера проблема в совместимости с HTML5
Discover the ultimate guide to replacing buttons on your Nintendo Switch Pro Controller hassle-free! Stay tuned to uncover expert tips and tools for a smooth DIY repair.
Buy tools on AMAZON-UK:
Full Set Buttons: https://amzn.to/3wkCGFY
Screwdriver Set: https://hfixt.com/uk1
Opening Tool Set: https://hfixt.com/uk2
Magnetic Mat: https://hfixt.com/uk3
Tweezers: https://hfixt.com/uk4
Spare parts on AliExpress:
Button full set: https://s.click.aliexpress.com/e/_DmULP1X
Rubber Pad: https://s.click.aliexpress.com/e/_DC1eXTj
Screwdriver set: https://hfixt.com/alis
Opening tool set: https://hfixt.com/alit
Tweezers set: https://hfixt.com/altz
Magnetic Mat: https://hfixt.com/amat
???? *Useful links*
More DIY repair guides: https://how-fixit.com
Switch Pro Controller Disassembly: https://youtu.be/FNX9hyhe9Xo
Switch Pro Controller Shell Replacement: https://youtu.be/iuMjdX9LYO0
Follow me for more gaming tips and tech insights:
Instagram: https://www.instagram.com/howfixit/
Facebook: https://www.facebook.com/HowFixit/
Twitter: https://twitter.com/HowFixit
???? *DESCRIPTION*
Welcome to HowFixit! In this comprehensive tutorial, learn how to replace buttons on your Nintendo Switch Pro Controller effortlessly. We'll walk you through the step-by-step process, highlighting essential tools and techniques for a seamless repair. Don't let faulty buttons hinder your gaming experience – follow along and level up your repair experience today! Subscribe to HowFixit for more tech guides and stay ahead of the game!
Key Takeaways:
- Essential tools for Nintendo Switch Pro Controller button replacement: Phillips-head screwdriver, tweezers, plastic opening tool, and magnetic mat.
- Step-by-step disassembly guide to access and replace buttons.
- Tips for managing screws and flex cables during disassembly.
- Links for replacement buttons are provided.
- Reassembly process to ensure proper functionality.
Video Content:
1. Introduction to the repair process and necessary tools.
2. Disassembly steps, including screw removal and opening the controller.
3. Removal of L, R, ZR, and ZL buttons.
4. Extraction of control button board and rubber pads.
5. Installation of replacement buttons.
6. Reassembly instructions and finalizing the repair.
Time Code:
00:00 - Intro to Buttons Replacement Guide
00:13 - Tools required for repair
00:47 - Disassembly process
02:32 - Removal of L, R, ZR, and ZL buttons.
03:38 - Control button board removal
03:57 - Buttons removal
04:23 - Installation of replacement buttons
05:52 - Reassembly and final steps
09:30 - Finishing touches
AFFILIATE PROGRAM
We are a participant in the Amazon Services LLC Associates Program, an affiliate advertising program designed to provide a means for us to earn fees by linking to Amazon and affiliated sites.
#nintendoswitch #howfixit #switch
Теги:
nintendo switch pro controller button howfixit nintendo switch pro controller buttons replacement nintendo switch pro controller custom buttons nintendo switch pro controller change buttons nintendo switch pro controller buttons not working nintendo switch pro controller b button not working nintendo switch pro controller zr button not working nintendo switch pro controller zl button not working nintendo switch pro controller replacement buttons
Похожие видео


Мой аккаунт