
Thursday, 04 June, 2026г.


Где искать: по сайтам Запорожской области, статьи, видео ролики
пример: покупка автомобиля в Запорожье
Call of Duty WWII Midnight For Tesla Gun ! First Level
 У вашего броузера проблема в совместимости с HTML5
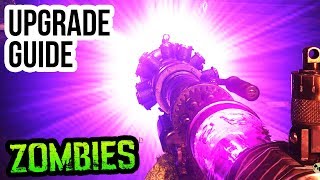
Yes, you can upgrade the Tesla Gun and make it even more powerful. Doing it is pretty tricky, and unlocking the parts you need for the Weapon Forge isn’t explained anywhere in-game. It’s all part of the “hardcore” Easter egg, and it’s totally secret. Follow the step-by-step instructions below for each of the four elemental variants and learn how to conquer the undead Nazi hordes with the best Tesla Guns in Call of Duty: WW2.
Next up is the assembly of the tesla gun. To get the 2 missing parts for the tesla gun, you’ll have to escort the Geistkraft Device into the laboratory first. There will be a red area around the device and you’ll have to kill zombies within that area to make it move. Once you’ve reached the end of the escort, the device will stop and power up a generator. Simply wait about 45-60 seconds for the generator to finish. You can now pick up the Tesla Gun barrel.
After the device has moved back to the command room on its own, you’ll have to escort it again by killing zombies in the red area, but this time it’ll head over to the morgue. Once it’s here, you have to wait 45-60 seconds again for the giant blender to finish. Once you’ve picked up the Tesla Gun core, head back to the command room and place both parts in the weapon forge (be careful though as a powerful Brenner zombie will spawn in first. Make sure to get a somewhat decent wall weapon for this part). You can now pick up the Tesla Gun, which will also unlock you the “Lightning Handler” trophy.
Home » Game Guides » Call of Duty WW2 » Call of Duty WW2 Zombies: The Final Reich Easter Eggs Guide
Call of Duty WW2 Zombies: The Final Reich Easter Eggs Guide
November 2, 2017 by Jeanmi96 12 Comments
Call of Duty WW2 has two main easter eggs in The Final Reich Zombies Mode. This step-by-step guide describes how to solve the main easter eggs.
The first part of this guide will cover the “easy” easter egg and for this you’ll actually have objective markers which will help you navigate through it. The second covers the “hard” easter egg, which is a continuation of the easy one. Doing the easy easter egg will reward you with just the “Fireworks” trophy. Doing the hard hard one unlocks both the “Fireworks” and “Dark Reunion” trophies as you have to complete all the steps from the easy path up until the 2 final steps.
Easy Easter Egg Walkthrough
The first part of the guide will show you how to beat the Panzermörder (Klaus) and retrieve the artifact on the map The Final Reich for trophy “Fireworks”. To make this whole “easter egg” a lot easier you should keep pressing the touchpad button on your controller, as most of the objectives will be highlighted in-game. It can be completed solo offline or with any number of players in co-op. Now, the steps you have to complete are:
Step 1: Turn on the power
There is a generator in the middle of the map with 3 red lights on it. Your objective is to make all of them green. For this you have to turn 3 gas valves around the map for about 6 seconds each. The first one is located right behind the Geistschild machine in the village square area, the second one is also in this area to the left of the bunker door you are trying to open. For the third and final one, you have to open the door towards the pub. You can simply look for the power cables connecting the generator and the gas valves on the floor. Just follow them to all the respective valves.
Now that the generator is working again, activate the flamethrower trap in the middle of the town square. This will blow up the wooden lid covering the entrance to the sewer area. Once you are down there, there is only one path you can follow and you should see the actual power generator for the map on the left side next to the exit. Simply hold :sq: to turn it on.
Step 2: Rerouteing the power in the bunker
Теги:
Call of Duty: WWII Nazi Zombies Easter Eggs Build all 4 Variants of the upgraded Tesla Gun How to Build all Tesla Gun Upgrades the Final Reich
Похожие видео


Мой аккаунт