
Tuesday, 16 June, 2026г.


Где искать: по сайтам Запорожской области, статьи, видео ролики
пример: покупка автомобиля в Запорожье
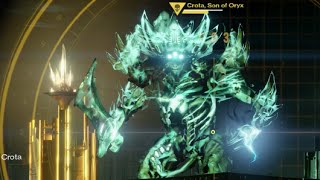
Destiny - Solo Crota's End Raid - Low Level Challenge
 У вашего броузера проблема в совместимости с HTML5
With the Taken King dropping on the 15th and the Gjallarhorn nerf coming tomorrow. I decided to solo Crota's End Raid with the lowest level I could. I was a 27 for the Abyss. 28 for the bridge and Shrieker hallway. 30 for Deathsinger. 32 for Crota.
My Channel: My Channel: https://www.youtube.com/user/Durren8
Destiny Playlist: https://www.youtube.com/playlist?list=PL_6fyKDdtFRFRWNMK9g58lXNJ-hLwNRLo
The Last of Us Walkthrough: https://www.youtube.com/playlist?list=PL_6fyKDdtFRGlRS4W6amn0l5LXMli64Xz
The Last of Us DLC: https://www.youtube.com/playlist?list=PL_6fyKDdtFRHLSVyCrUBfvLFb0MDUPyyB
South Park Let's Play: https://www.youtube.com/playlist?list=PL_6fyKDdtFRHrEgCv1CjzqrGawFUJxaKM
Skyrim Random: https://www.youtube.com/playlist?list=PL_6fyKDdtFREJmAUj3EgvGp2KgZ6GYUF3
The Abyss
The team will land in a lighted area at the bottom of the Hellmouth. A pillar of white light can be seen in the distance. This area, outside the starting point, will continuously apply a debuff called Weight of Darkness, which can stack up to 10 times. It disables the ability to double-jump and reduces movement speed. Weight of Darkness can only be removed by standing close to one of the lighted pillars. However, as each pillar is used, the light will eventually turn orange/red, indicating that it has absorbed as much darkness as it can. Once the light is a deep red it will explode, killing anyone caught in the blast. The team must travel from light to light, fighting off hordes of Thrall and the occasional Cursed Thrall and Knight until reaching the end of the area. This only requires 1 guardian to complete so if preferred the team my choose 1 player to complete this alone and the others can fight off the Thrall.
The Bridge
This area is divided into two separate platforms, connected by a temporary bridge which again must be formed by a guardian standing in a circle. Unlike previous bridge-forming circles, the guardian must remain in the circle to keep the bridge present, it will decay and disappear if the circle is not occupied. To both the left and right of the forming circle are floating pillars called Annihilation Totems. While the bridge is being formed, the totems will start turning orange and will wipe the team after a few seconds. This must be countered by having two additional players (one on each side) stand in the circles beneath the totems. The players can also abandon the attempt to form the bridge (by stepping out of the circle) to prevent a wipe if the totems have not yet fired.
The phase is begun when a guardian begins forming the bridge, which will trigger enemy spawns. Among the normal Hive enemies is a Swordbearer. When a Swordbearer is killed, it will drop a sword which one player must pick up within a brief period of time before it despawns. Only players carrying a sword may cross the bridge; swordless players who step onto it will be instantly killed from a debuff known as Bane of the Swordless. The sword will last for 1 minute after being picked up, so the other team members must coordinate to have the bridge fully formed at the moment the sword is claimed.
On the other side of the bridge, the sword carrier will encounter blue knight variants called Gatekeepers. These can only be damaged by the sword, so the carrier must kill them quickly before the sword disappears. One gatekeeper will spawn for each Swordbearer killed. The carrier must also be careful not to spend too much time in the bridge-forming circle on the far side as that will trigger a second set of annihilation totems.
Once the sword despawns, another Swordbearer will emerge and the process must be repeated to move a second player across the bridge, and then again for a third. At that point the two halves of the team switch roles, and the players on the far side of the bridge must use their own forming circle and anti-totem circles to form the bridge while the players remaining on the starting side obtain swords and come across.
The last player on the first side will have to solo the Swordbearer, but his teammates can provide supporting fire from the other side. The staircases to the left is a relatively safe spot to take cover if the number of enemies in the area is too great.
destiny, destiny gameplay, ps4, destiny house of wolves, destiny dlc, destiny house of wolves gameplay, destiny crota's end raid solo walkthrough, casually one manning crota raid, destiny crota raid titan solo, destiny crota raid hunter solo, crota raid warlock solo, destiny crota end solo abyss, destiny crota end solo bridge, crota cheese, crota raid cheese, destiny gameplay, durren8, durren, funny video, bane impression, destiny dark below dlc, destiny house of wolves, destiny dlc, destiny solo crota's end raid.
Теги:
destiny solo crota destiny crota raid destiny crotas end solo destiny crota raid solo guide destiny crota raid solo walkthrough destiny crota cheese destiny taken king durren durren8 destiny crota bridge destiny crota abyss destiny bones of eao destiny crota bridge cheese destiny crota bridge bones of eao destiny crotas end raid guide destiny solo crota kill destiny crota raid solo low level
Похожие видео


Мой аккаунт