
Thursday, 04 June, 2026г.


Где искать: по сайтам Запорожской области, статьи, видео ролики
пример: покупка автомобиля в Запорожье
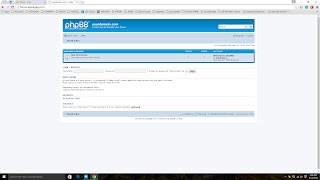
How to Install Phpbb
 У вашего броузера проблема в совместимости с HTML5
Follow this step by step guide on how to install phpBB with the help of wamp server. We will teach you how to configure the phpBB database.
Don't forget to check out our site http://howtech.tv/ for more free how-to videos!
http://youtube.com/ithowtovids - our feed
http://www.facebook.com/howtechtv - join us on facebook
https://plus.google.com/103440382717658277879 - our group in Google+
In this tutorial, we will guide you on how to install Phpbb.
To install Phpbb, you would first have to install a webserver. For the purpose of this tutorial, we have already installed wampserver in windows.
Step 1 -- Open phpMyAdmin
Let us get started with the installation process. First of all, we will have to create a database which will be used in phpBB. In order to do that, click on the wampserver icon over and open up phpMyAdmin.
Step 2 -- Create Database
Once you are done, your phpMyAdmin page will open. Over there, let's move over to the Database section and create a new database. Once you have named the database, click on the create button there.
Step 3 -- Go to wamp directory
With that taken care of, now let's open up the wamp directory and over there, go to the www folder.
Step 4 -- Copy phpBB3 directory
In the www folder, we will copy the phpBB3 directory which we have already downloaded from phpbb.com. You can go ahead and download the directory from the website and paste it here.
Step 5 -- Open localhost phpBB3
Next open up the web browser and in the address bar on the top, type "localhost/phpbb3" before hitting the enter key.
Step 6 -- Go to the install tab
With that done, the following page will open up in the browser. Over here, you will need to go to the install tab and click on the Proceed button to go to the next step.
Step 7 -- Start Install
When the new page loads up, scroll down and click on the Start Install button.
Step 8 -- Configure the database
With that done, you will be redirected to a new page. Now you will be required to type the database information, including the database type, the server hostname and the database name along with its username. With all that taken care of, you can click on the button below to proceed to the next step. Then, the database connection would be established by the system before you can proceed any further.
Step 9 -- Adminstrator Configuration
Now you will be required to type the Administrator Configuration details for phpBB. This includes the admin username and password along with the email address. With that done, we can proceed to the next step.
Step 10 -- Check administrator settings
Now the application will check the administrator settings. Once the test has been completed successfully, move onto the next step.
Step 11 -- Advanced Settings
Now, we will go to the Advance setting page. Over there, you will need to provide the settings which you want to use such as the email settings and the server URL settings. With that done, we can proceed to the next step.
Step 12 -- Create database tables
After the processing has been completed, a notification will be displayed to you that the database tables have been created. Now we can move forward to the next step.
Step 13 -- Installation Completed
And that's it. In the next window, you will be shown a notification that phpBB has been successfully installed. In this manner, you can install phpBB on your computer.
Теги:
phpbb install phpbb installing phpbb phpbb install mod install phpbb mods wamp server phpbb3 configure database database admin database configuration php learn php php tutorial php scripts learning php php lessons php programming php help php coding php scripting php for beginners how to learn php php video php code php script test php php video tutorials php html php forms guide manual tutorial video tutorials howto how to howtech
Похожие видео

phpBB Style cheerful00:42
renewal 3.2.000:45

Мой аккаунт