

Saturday, 11 July, 2026г.
















Где искать: по сайтам Запорожской области, статьи, видео ролики
пример: покупка автомобиля в Запорожье
How to Make a Beer Caddy | DIY Six Pack Carrier
 У вашего броузера проблема в совместимости с HTML5
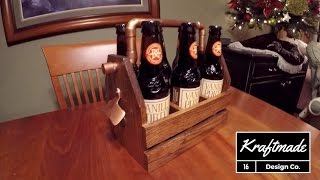
Learn how to build a Beer Caddy with DIY PETE! This is a fun and simple project that will be great for barbecues, parties, and heading over to watch a football game with friends and family. It's also perfect to take out for an evening of fishing with some friends. This project costs about $20 to build and can be built with either hand tools or power tools.
For more info, project photos, and downloadable plans check out:
http://www.diypete.com/BeerCaddy
Download Plans: https://gumroad.com/l/beercaddy
Make All of the Cuts
Cut each piece to size on your miter saw. For all cuts’ lengths and widths, refer to the cut list above. Some cuts may require ripping on the table saw or sliding miter saw, this is optional though, you can buy boards to exact size at store. For a complete, detailed cut list, refer to the downloadable plans.
Mark and Cut the End Pieces
For this beer caddy design, the two end pieces have an angle and a rounded top. These cuts are not hard if you do it all step-by-step with your miter saw or jig saw. The first thing we need to do is measure out where the angle starts and stops. On one of the end boards, measure 5 1⁄2” up from the bottom and make a mark on both sides. Then on the top, measure 2 1⁄4” in and make marks on either side. Then mark and drill the holes for the handle to go through. Detailed dimensions, measurements, and layout in the plans.
Assemble The Caddy
Once you have all of your boards cut to size and shape, it’s time to assemble the beer caddy. Apply glue to any joints that will be nailed together. Start by lining up the flush bottom with one of the end pieces. Glue and nail and repeat for the other end. Now with the bottom in place, we can attach the lower and upper side strips. For more detailed steps, photos, and dimensions refer to the downloadable plans.
Apply Stain and Clearcoat
We’re almost done with your beer caddy! Lastly, we need to apply your stain of choice and finish it off with polyurethane or another clear coat/sealer. I chose Minwax’s Special Walnut finish and the spray polyurethane. Use a brush to cut any edges or hard to get to corners. Once its all covered with the stain, allow it to dry for the manufacturer’s recommended time and then hit it all with a clear coat. You’re done!
A couple of add-ons/customizations I added to my beer caddy are: the bottle opener mounted on one end piece, the 5” wide by 2 1⁄4” tall chalkboard strip on the side, and the vinyl decals. The opportunities are endless here. Have fun and DIY!
----
Looking for more DIY videos? Be sure to check out our channel and subscribe for updates! We post a weekly tutorial every Thursday.
Looking for woodworking, concrete working, and other DIY projects plans to follow? You can download plans for free at http://gumroad.com/DIYPETE
Facebook: http://facebook.com/DiyProjectsWithPete
Instagram: http://instagram.com/diypete
Pete Sveen
1627 W Main Street Suite 182
Bozeman, Montana 59715
Теги:
Beer Caddy six pack carrier 6 pack carrier drone drone footage dji phantom 3 professional dji phantom 3 video uses for drones easy diy projects diy beer caddy Big Sky Brewing Company (Business Operation) bozeman flyworks easy wood projects moose drool trout slayer fly fishing gifts man cave fathers day gifts diy gift ideas diy gifts
Похожие видео


Мой аккаунт