

Saturday, 11 July, 2026г.
















Где искать: по сайтам Запорожской области, статьи, видео ролики
пример: покупка автомобиля в Запорожье
Making a Teapot: How to at Aston Pottery
 У вашего броузера проблема в совместимости с HTML5
Making a cup of tea is something most people are very familiar with so its strange that most of us know little about the teapots or cups which we use. That's why in this video we'd like to give you the full tour and show you how a teapot is made. Then, next time you use pottery we'll hope you stop to consider the long and surprising journey this integral part of our day to day life has been on, before, finally, you can use and enjoy it.
The journey of a teapot starts here at the blunger where a mixture of fresh and recycled clay is mixed with water and strong alkalis to create a liquid called slip. The slip can then be poured into molds designed specially here at the pottery and then are left for forty five minutes before they can be tipped. Because the clay dries quicker to form a solid at the edges of the mold, tipping after a carefully controlled amount of time allows most of the still liquid clay to fall away, leaving a soft but solid layer of clay around the outside. At this stage timing is very important, minutes can be the difference between a perfectly cast teapot and something which will have to be recycled in the blunger. The teapot is then left in peace for a few hours relaxation, so that it can continue to dry, before the excess clay which will not form part of the teapot is trimmed from the shape. The mold can then be gently apart, and the teapot removed. By now the clay is leatherhard, which means although the clay can now be handled, it is still pliable and can easily lose its shape. Now the molds are out they are left to dry overnight.
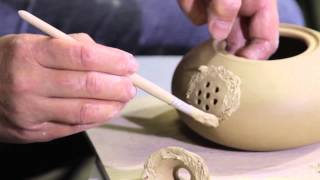
By the following day the teapots have dried further to a rigid solid, which can then be fettled and sponged. Fettling, is the process of removing the mold lines left over from the casting process, rounding square edges, and, in the case of a teapot, opening up the spout; all done by hand with a knife. Next a sponge is dipped in water and then continues where the knife left off, further smoothing rough edges and unwanted leftovers from the casting process. Running a wet sponge over the whole of the teapot also ever so slightly textures it, which creates a better surface for the designs to adhere to later. The fettled and sponged ware can then be packed in the kiln, and fired overnight to temperatures of around 800 degrees centigrade.
After the ware has been fired and the kiln has been left to cool the teapots can be removed and stamped with the Aston Pottery label. The teapot is then ready to be decorated. All our designs start life as drawings which are then used to produce stencils. Up to five stencils may be used to build up the layers needed to produce a single image. Our decorators who then apply these designs serve a two and a half year apprenticeship learning how to apply the fifty five different colours we use, to avoid too thin an application of colour, which can lead to fading, or too thick an application which prevents the glaze from sealing in the design. They will also be required to learn around 170 different patterns. Here, you can see, different colours are applied to four different stencils to produce our Agapanthus design.
Back down downstairs the items are dipped in a glaze made from sand flint, potash and felspar; all mixed together with water. The teapot absorbs the water in the glaze, which dries quickly over the surface and coats it. The gaps left from where it is held when dipped when are then covered with more glaze applied with a paint brush. Finally before it can be fired again, the base of each item is wiped on a belt of wet sponge, to remove the glaze from the base. This will stop it sticking to the shelf during the second firing.
This time the ware is fired in a kiln which reaches temperatures of eleven hundred degrees centigrade. During the process of firing the opaque glaze undergoes a chemical transformation which changes it to glass, coating the item. This seals in and protects the design making it durable, completely dishwasher safe and strong enough to last a lifetimes use. To finish off, when the kiln has been unpacked, a wet and dry stone is then dipped in water and used to smooth the base, before it is ready, finally, to be used.
Теги:
Making a Teapot How to Make a Teapot How a Teapot is Made Tea Tour Clay Slip Mold Cast Leatherhard Kiln Fired Fettled Sponged Designs Decorated Stencils Colour Glaze
Похожие видео


Мой аккаунт