

Saturday, 15 August, 2026г.
















Где искать: по сайтам Запорожской области, статьи, видео ролики
пример: покупка автомобиля в Запорожье
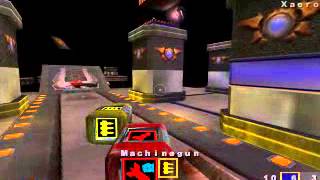
Quake 3 Nightmare Xaero Speedrun - 30.07 s
 У вашего броузера проблема в совместимости с HTML5
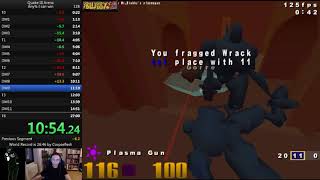
A speedrun of the Xaero level in Quake 3 Arena on Nightmare difficulty, in 30.070 seconds game time.
This video was recorded from demo playback using cl_avidemo. The audio was also recorded from demo playback, but separately.
The zooming effect was achieved by holding down the right mouse button during cl_avidemo demo playback at the same times that I was zoomed in during the original playthrough.
Because this video is at 60 FPS, the first frame that shows 10 frags shows a time of 30.085 seconds, though in demo playback the first time this happens showed "time: 30070".
To record the demo, I bound my movement keys to issue the 'record' command in addition to moving the player, e.g. bind w "+forward;record". Then, I held down movement keys while the level was loading.
To show the more precise game time at the top of the screen, I used the command cg_drawSnapshot 1.
I used an sv_fps value of 200. The sv_fps setting affects jump height. I think sv_fps 200 gives the same effective gravity as the default of sv_fps 40 (both giving the nominal gravity of 800). sv_fps 125 gives too much jump height (effective gravity of 750?), and you end up overshooting the second BFG jump pad.
Gameplay Notes:
This level has only 8 spawn points, 4 per side of the map. On the side of the map that the player starts, they are:
1: The player's initial spawn point
2: Just in front of the pillar between the BFG ammo and the 25 health spheres
3: Just in front of the pillar to the right (in the direction of the railgun spawn) of the minigun ammo and rocket ammo
4: Behind the pillar to the left of the rocket ammo
The spawns for the other side of the map are just arranged as the mirror image, and can be labeled similarly *1, *2, *3, *4.
(Xaero's spawn order this game was *1, 1, *2, 4, *2, 4, *2, 4, *2, 3.)
As the level is loading, I hold forward and strafe left, while moving the mouse left. This sets me up for the initial circle jump. It is actually quite easy to jump too soon here and jump over the railgun and not pick it up.
Frag 1: Take the BFG jump pad and land 4 minigun hits on Xaero, finishing with a railgun shot.
Frag 2: Jumping down from the BFG platform, shoot at the railgun spawn with the BFG, expecting Xaero to respawn at 1, but be ready to adjust your aim up towards spawn 2. If he spawns at 4, it is possible to still get an Excellent frag if you quickly aim at the gap between the pillars in front of and behind spawn point 3, but I cannot do this shot consistently at all.
Frags 3-10: Normally, now Xaero will alternate spawning between the other side and your side.
If he is going to spawn on the other side, I prefire three BFG shots at the platform area between spawn *2 and *1. The hope is that he spawns at *2 or *1 and walks towards the railgun, taking at least 25 damage from the BFG so I can finish him off with 1 railgun shot. If Frag 1 made him drop his railgun in a bad place, he might walk towards the dropped railgun instead. For example, he can spawn at *2 and walk to the left (from my point of view) towards a dropped railgun, negating me the quick kill.
Pick up the BFG ammo on your side at some point (here, walking backwards after Frag 4).
If he is going to spawn on your side, you can be ready for his spawning at any of the four spawn points. Pick up the railgun again if you can, to make it not present when he spawns.
Stand behind the pillar left of the railgun spawn, aiming towards spawn 1.
If he spawns at 1, you can shoot 2 or 3 shots at the ground in front of him. This kill is easy to screw up; with bad aim, the first shot will knock him off the platform, so you have to finish him with a railgun shot at him in mid-air as he is falling.
If he spawns at 2, 3, or 4, you can do a backwards circle jump towards the rocket launcher side of the platform (as in this video). Use sound to quickly identify when he has spawned at 2.
If the spawn sound comes from 2, shoot 2 or 3 shots at the ground between spawn 2 and the BFG ammo (you should still be in mid air from your jump).
If he spawns at 3 or 4, shoot at the ground beneath the rocket ammo and minigun ammo (again, while still in mid air). You should start shooting before you have seen him. If he happens to have spawned at 3, you can easily adjust your aim once you see him.
If you didn't pick up the railgun and he spawns at 2, he will walk towards it (towards your left) instead of towards the BFG ammo, losing you the quick kill. If he spawns at 3, something worse can happen where instead of walking towards the rocket launcher, he walks towards the railgun, towards you, and you kill yourself with the BFG.
Because I didn't expect to get the quick kill via 2 BFG shots for Frag 9, I was late in repicking up the railgun, and so didn't get back into the correct position for the final backwards circle jump.
Похожие видео


Мой аккаунт