
Thursday, 02 July, 2026г.


Где искать: по сайтам Запорожской области, статьи, видео ролики
пример: покупка автомобиля в Запорожье
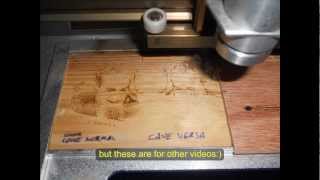
Sherline Z-Axis Backlash Eliminated. Zero..... Finally did it.
 У вашего броузера проблема в совместимости с HTML5
Well, its eliminated but I believe less than 0.01 mm. My dial indicator have 0.01mm lines and I cannot measure backlash. that means... Success.
Sherline is legendary about backlash. I had no problem with X and y axises but whatever I did, including software settings, I always had 0.01 to 0.09 (yes, almost 0.1 mm) backlash. My first wooden CNC has less than that. So today I suddenly decided to change z-axis screw and nut.. actually all mechanism. Sherline's backlash adjustment nut was useless to me. If you somehow eliminate backlash with it, that time you could not move hand wheel as it becomes too heavy.
Important thing is it should be cheap and easy to make. When it grinds after some work hours, should easily be made.
Now after so many moves, cutter returns to exact same location. And works very smooth. I have complete control over z-axis by hand, or by mach3. Happy, happy, happy...
instructions: (to Wongsterwish)
there's nothing in that cylinder. all this white block is delrin.
Take of all mechanism. I used M5 metric screw. theres also a metric ball bearing that exactly fits to channel in column. You can see the rest in video.
1. measure the sizes of backside of z-azis. Dimension the block as you wish. mine is 61mmX20mmX45mm
2. Open two channels. two rails of z column must fit into that channels. its not precise. my channels are 9mm wide.
3. on the middle block, take the edges with a knife. make it roughly look like cylinder. don't worry about the size. when you make it correct, it should fit back of the vertical column.
4. you'll see that there is a need of fine adjustments. use a sharp knife and make it move on column easily.
5.there's already a hole for z-nut at the right side of sherline. Drill a hole to delrin so you can use it. dont worry, its position is not so critical.
6. Drill a hole at the opposite side. to delrin and to black column slide. screw both together. this will hold other side of delrin.
The critical point is: use ballbearing mechanism on video. it holds everthing in place. M5 tapping and 45mm height of delrin makes it tight enough to hold everything yet, obtains smooth movement. Left and right holding screws are not critical. Today I used 2 washers to obtain some extra height. dont worry, you'll see that long z-axis screw is not vertical, if you did wrong measurements.
here's the rough drawing. sorry its 2am here and I'm little tired...:)
http://www.karina-mira.com/cnc/sherline1.png
Теги:
Sherline z-axis zero backlash eliminated diy DIY homemade mill ofisproplus aykut cantürk karina mira karinamira
Похожие видео


Мой аккаунт